Sunday, January 27, 2008

Happy


Isn't this a fun card? When I sat down to make it I really didn't have anything in mind. I just found some scraps of this DP and new I wanted to put them together. After that I just went with the flow and ideas just came to me. Pretty cool I think. I hope you enjoy it too.
Supplies:
DP-SU petals & paisleys
CS-SU whisper white & pretty in pink
Markers-SU pretty in pink, tempting turquoise, & old olive
Stamp set-SU polka dots & paisleys
Ribbon- JoAnn's
Scallop scissors
Hole punch
Photo corner punch-SU

Thanks So Much


I just got the new SU mini catalog in the mail yesterday and I have to say I really really like it! I'm glad too because I didn't like much in the Sell-a-bration catalog. It's kind of bad too though because I just placed a really big order so there aren't many funds left to buy anything right now. Oh well, I'll just have to wait a few months I guess.
The color combo for this card was inspired by the projects on the front of the new SU mini catalog. I think they're fun! I hope you like them too.
Supplies:
Stamp-Archiver's
CS-SU old olive & pumpkin pie
Markers-SU mellow moss & pumpkin pie
DP-SU petals & paisleys
Felt flowers-SU flower fusion
Crystal brad-Michael's
Ribbon-JoAnn's

Saturday, January 26, 2008

Fun With Flowers


In my big SU shipment I also got the new beads in all of the colors! Each color comes with large beads in several shades of that particular color and matching microbeads. They are so fun! I colored each flower and then adhered the beads with clear drying glue. Then I accented the stamens with Stickles glitter glue. I used my new SU double rectangle punch to create holes to weave the ribbon through. Pretty cool!
Supplies:
DP-WalMart
CS-SU
Stamp set-SU Time Well Spent
Ribbon-Jo-Ann's
Markers-SU

Pretties Kit Fun


I used the Christmas money I got and placed a huge order from SU and it just arrived the other day! I was especially excited to get my Pretties Kit. I've been wanting it for a long time and now it's mine and I adore it. This is the first card I've made with it and it was so fun! The flowers come white but can be colored to match anything. I used my Mellow Moss SU marker to color this flower to match the paper and I would say that you would never be able to tell that it started out white.
Supplies:
CS-SU
DP-SU
Button, flower, and pin with pearls-SU
Brads-Michael's
Statement-Papertrey ink

Embossed Elagance


So simple and elegant don't you think? This is probably the easiest card I've ever made. I just embossed the center with my CB and an embossing folder. Then placed a brad in the center and ribbon along the top. Just that easy!

Supplies:
CS-SU whisper white
Brad-Scrapbook Corner
Ribbon-Archiver's Hot Spot bin (free with a coupon!)

Another Balloonabella


Here is another Valentine's Day card I made with Balloonabella. She is so sweet. If you haven't checked out the Stamping with Bella website you should. There are Bellas and Fellas for almost every occasion. You can follow the link on my sidebar below.
Supplies:
CS-SU
Markers-SU
Funflock on Balloons
Nestabilities Circle dies
Scallop scissors
Ribbon-Wal Mart

Friday, January 25, 2008

So Very


Well, another week has gone by. Yea! I shouldn't wish my life away but I love it when the work-week is done so I can relax with the kids & hubby, and have energy/creativity to make cards. Plus, it's another week closer to our Disney vacation in the fall!

So this is a card I just finished making. It is from a sketch challenge on SCS. These challenges are fun and cut out some of the thinking because your layout is already decided for you. You just have to pick out the paper, stamps, and embellishments. If you haven't tried one yet you should get over there and pick one out. I could use this card for my parents because they are all the way down in Texas during the winter and we all miss them very much. I hope you like it.

supplies:
CS-SU not quite navy & marigold morning
DP-SU Petals & Paisleys
Ink-SU mellow moss
Marker for stitching-SU not quite navy
Stamp set- SU So Very
Large and small oval punches
Scallop scissors
Crystal brads-SU
Felt flowers-SU Flower Fusion

Tuesday, January 22, 2008

Thanks So Much

I have to say, this color combination is my new favorite. It is just so bright and cheery! The flower stamps in this card are from SU's A Good Thing set. I colored them with my SU markers. I've said it before but I'll say it again...I love how SU markers match their paper perfectly! They make everything look so professional. I used SU eyelets in the corners for accent and lots of layering of the CS. I used SU's large oval punch to punch out the sentiment and my small scallop scissors around that. The sentiment is from a set I got at Archiver's (sorry I don't know the company name) and I used my red SU marker to color the "thanks" so it would tie in to the rest of the card. Hope you like it!

Bundle of Joy


This is a layout design from the new SU catty. I think this little bear from the Bundle of Joy stamp set is just so cute! I colored him with my brown SU colored pencil and used a blender pen to get the soft water color affect. I cut out a circle from the blue CS with my Nestabilities die to create a window frame and accented this with paper piercing. This frame was then adhered with pop dots to create a 3D affect. This was then placed over the red CS strip which was also adhered with popdots and accented with a red ribbon. The sentiment in the corner says "sweet heart", also from the Bundle of Joy set. Enjoy!

Sunday, January 20, 2008

Circus Train


This is such a cute set. It was on the list of retiring stamp sets from SU and I had to get it before it was gone. I think it's perfect for babies' and little kids' cards. Since it's a circus train I had to use primary colors, they are just so fitting. I used my SU markers and SU CS so everything would match. I raised the main image with pop dots so the train would fit under it. Then just placed a piece of SU's Hodgepodge Hardware with a ribbon on the end to use as a handle to pull out the train. I think kids would really enjoy playing with this card. Enjoy!

Saturday, January 19, 2008

Pretty Flower


The title of this card makes me smile. It reminds me of a New Year's Eve about 15 years ago. (This was before I met my husband by the way.) A group of my friends and I had been out for a New Year's Eve celebration in downtown Indy. We all bought tickets for this package deal where we had a really nice dinner, drinks, and then watched a live concert until midnight. Well, needless to say, we all had quite a bit to drink, one friend especially. He was kind of a bigger guy and quite manly. After returning to a friend's apartment we sat around talking and this guy fell asleep (if that's what you want to call it). Well, when you're the first one to fall asleep you're just asking to get messed with! I mean you're free game! :) So we started tickling his face, putting things in his ears, taking funny pictures of him, etc. Well he must have been dreaming some wild dream because he started saying "Pretty flower!" And we kept asking him what he was talking about and what he meant but he just kept saying "Pretty flower!" in this sweet soft voice. It was hilarious! This big manly guy talking all girl-y about flowers. We never let him live it down. I know you had to have been there to appreciate it and maybe the alcohol in our systems was making it more funny but it was classic. I'm sure if I called any one of those friends who were there right now they would know exactly what I am talking about and laugh. I will never forget it.

Card supplies:
Whisper White CS-SU
Ribbon-Michael's
Photo corners-Scrapbook Corner
2-step flower stamp from SU
Inked with SU markers
Image adhered with popdots
Corners embossed with CB

Friday, January 18, 2008

Balloonabella


Hi again everyone! It's been a long week but it's finally over! Now we just have to prepare ourselves for the frigid weather that's about to hit us. It will be around 13 degrees tomorrow and Sunday with wind chills below zero. Yikes! A great weekend to make some chili, snuggle under a blanket and watch football. Since our Colts aren't in it anymore we're now cheering for the Packers. Go Pacs Go!!
So this is Balloonabella. Don't ya love her? Very sweet and perfect for Valentine's Day. And pink & brown are one of my favorite color combos. I hope you like it. Mary

Supplies:
CS-SU
Nestabilities die cuts
scallop scissors
markers-SU
stickles glitter on bottom of dress
fun flock on balloons (looks red in picture but is dark pink IRL)
ribbon from & DP from Archiver's (don't know brand-sorry)

Tuesday, January 15, 2008

Simple and Special


Hi everyone! I hope you are all having a good week so far. I'm having a pretty good week except that I'm really tired tonight for some reason. But I really wanted to get something new on my blog so I decided on this very easy card. I cased this card from one I saw on SCS last week. That site is a must for paper crafters! You can get such good inspiration there. All I did for this card was cut a piece of white cardstock the same size as the front of the card. Then I embossed the lower half of it with my CB and highlighted the raised areas with my SU chalks. I added 3 embossed lines to give a good separation of the 2 areas. Next I punched evenly spaced rectangle holes at the top for the ribbon. Then I just added the sentiment on a pop dot and voila. Super easy! Now I'm off to bed. Nightie night :).

Sunday, January 13, 2008

By the Sea


The image on this card makes me think about my husband and I and our future trip to Florida. Well, to be more accurate there needs to be 2 kids running around us kicking up sand and screaming, but you get the idea. :) We will be going to Florida in the fall of this year for 2 weeks and I'm hoping we will be able to find a little bit of time for the 2 of us to sit on the beach and watch the sun set.

I cased this card from someone on SCS who made one very similar but with a different image. It is layered with pop dots to give it a 3D affect. The waves were done by hand tearing pieces of paper and sponging white craft ink on the edges to create wakes in the waves. I used the same white craft ink to sponge clouds in the sky. I colored the image with my SU markers and cut it out. Then I cut out the oval with my Creative Memories oval cutter (because my Nestabilities oval dies aren't in yet) to create a "frame" for the image and added some more white ink on the edges to give it more of a beach-y white wash look. And in case you can't read the sentiment it says "Joy is not in things, it is in us." So true!

Saturday, January 12, 2008

Teddybella


This card is for a coworker who just found out that she is pregnant with her first baby. When I she told me I thought "Great! Finally a reason to buy this Bella!" (as if you ever need a reason to buy a Bella;) ). Isn't she adorable?!

The DP is from SU and is about a thousand years old. I really like these colors together so I'm surprised I even had any left. I just accented it with Choc. Chip CS and piece of Hodgepodge Hardware and ribbon. I lined the envelope with some of the DP too for an added touch. I colored in the image with my SU markers. I know I've said it before but I'll say it again...I love my SU markers and how they match all of their CS. I hope she likes it.

Happy Hello


Isn't this hedgehog just the cutest? I've wanted a hedgehog stamp since I first saw the one from SU a few years ago. I wasn't able to get it before it was retired. :( So when I saw this one at Archiver's I knew I had to have it.

I don't know who the DP is from but it is one of my favorite's. I got it at Jo-Ann's and have used it to make many cards over the years. The CS is from SU. I colored in the image with my SU markers and added a little glitter on the bees' wings and the center of the flower. I used SU's large and small oval punches for the sentiment and used my small scallop scissors for the medium (green) oval.

I love it. I think it's just so happy and friendly! Mary

Friday, January 11, 2008

It's Been a While


Hi again! It's been a while since I've posted anything because I've been at work all week. I am a surgical nurse and by the end of the day my legs and feet are so sore and my brain is so tired that the only thing I want to do after fighting traffic to get home, making sure my kids' homework gets done, fixing dinner, getting things ready for the next day, giving baths, reading stories, and putting my kids to bed is put my self to bed too. So there is no energy or brain power for creativity and card making. But I made up for it today! I have Fridays off and even though I have errands and stuff to do I try to get some "Mommy time" in there somewhere to make some cards and crafts. I hope you like them!

Monday, January 7, 2008

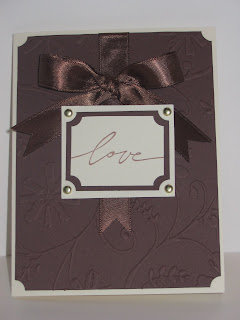
Brown is the New Red :)


Well, tomorrow is my son's first day back to school after his Christmas break and he is very bummed. He said tonight that he wished it could be Christmas forever (every child's dream). Poor boy. I can't blame him really. I remember the days of school and homework-Yuck. Heck, I feel that way every Sunday night when I know I have to go to work the next morning! I told him to just look forward to tomorrow night when we will be going out to eat to celebrate my birthday. For some reason that didn't help him feel better. :) Yes, tomorrow is my birthday! One more year of the thirties and that will be it. :( Very sad. They keep telling me that forty is the new twenty, but I think that's a bunch of hooey. It's always people who are over forty who say that so I think it's a scam.

Anyway, here is a Valentine's day card that is an alternative to the classic Valentine red. There is something very soft and classy about the brown, vanilla, and gold. I was inspired by Carolyn King's card that is very similar to this one. She does excellent work and I am inspired by many of her projects.
Supplies:
cardstock: Very Vanilla, Choc. chip
embossing: CB
ribbon and brads: Michael's
sentiment: SU
ink: choc. chip
image raised with pop dot


Saturday, January 5, 2008

Hugs and Kisses


Well, I took down our Christmas tree today and put away all of the decorations. :( It's so dreary and sad. So I took a long soak in the tub (using one of the bath fizzies from my friend's site-Just Add Water by Cynthia-see below for link-awesome!) and made this fun card to cheer me up. This card is kind of funky and has a lot going on but I think it's fun. I hope you think so too!


Supplies:
cardstock from SU: pretty in pink, choc. chip, and DP (can't remember the name)
markers from SU: pretty in pink, positively pink, and choc. chip
sentiment from SU: So Many Sayings
frame from Archiver's
hardware from SU
ribbon from Archiver's
crimper for pink paper in corner


Friday, January 4, 2008

Time Well Spent


For me, time making cards is time well spent. The whole process fills me with such pride, joy, and accomplishment. Especially when others enjoy something that I have created. Finding this hobby has truly been a gift from above.

So I hope you like this card. I intended on making a Valentine's card but it developed into more of just a friendship card. Sometimes things don't go as planned and yet it turns out for the better, like in this case. I really like how it turned out. All of the cardstock, ink, markers, and stamps are from SU as well as the swirling piece of hardware. The ribbon is from Wal-Mart. I trimmed the bottom front flap to make room for the flowers that I punched out with my circle punch. I accented around those with my small hole punch.

I hope you all have something you love to spend your time doing just like I do! :) Mary

Wednesday, January 2, 2008

Masculine Birthday Card


Rick, I know you have a subscription to my site so if you are reading this look away now because this is your birthday card! Rick is my brother and his birthday is next week, 5 days after mine. He is a great guy who I love very much. So I wanted to make him something special. This card shows him just what he should do for his birthday, relax and enjoy himself. :)

I made this card with the stamp set "Let's hear it for the boys" from MFT. I didn't have many masculine stamp sets so when I saw this one I knew I had to have it. I chose these colors because they seem masculine to me. I colored with SU markers to match the strips in the DP. I stamped on another DP for the chair to give it some texture and cut it out and adhered just that piece on the main image. I used SU's corner punch to punch out 2 different sized and colored pieces to accent the image and then used my piercing tool to add more interest. The hardware is from SU's Hodgepodge Hardware. The ribbon is from Wal-Mart. I also cut out a piece of the striped DP to line the inside of the envelope. I've never done that before but I really like it. I love when things coordinate. I hope my brother likes it to!

Tuesday, January 1, 2008

One More for Christmas


I know, I know, Christmas is over! But I've been wanting to do this project and haven't been able to find a sheet of sticky strip until a few days ago so I had to try it. I suppose I could have done a heart instead of a Christmas tree but that is what I had originally wanted to do so that was all I was thinking about. Oh well, it won't go to waste. I'll just put it away for next Christmas.

This project was another very easy candle project. I cut a strip of the sticky sheet the same size as the candle. Next I drew the design of the tree onto the paper coating of the sticky sheet. Then I cut out the design with a craft knife being careful to only cut through the paper coating, I did not pull out the design yet. Next I pulled off the backing of the paper and adhered it to the candle. Then I pulled off the paper coating tree design and poured green micro beads over it. Next I pulled the paper coating off the rest of the candle and poured white glass micro beads over it. Lastly I added the red crystal and ribbon. It is so sparkly! Have you ever worked with these micro beads before? Man, let me tell you. They get everywhere! I'll probably be picking them up for months! I learned that it helps if you wipe out the tray or container you are using with the Embossing Buddy from SU to decrease the static. It also helps if you pour the beads into the tray and just roll the candle into the beads. Then they don't bounce around and get everywhere. Learn through experience I guess!

Contemporary Valentine


I have never made a card where I trimmed off the bottom of the front flap before but I like how it turned out. It left a great place for me to put this sticker strip I got from Archiver's. I also don't use black very often but what goes better with silver than black?! I got this ribbon from Archiver's for free from their Hot Spot bin with a coupon (the pack came with 6 rolls of different but coordinating ribbon--great deal!). The ribbon has some tan in it so I used some tan cardstock to accent the sentiment and tie it all together. The sentiment is from a set of stamps I also got at Archiver's with a coupon for 30% off. I don't go to that store very often because I think things there are a little too expensive, but with coupons like these I couldn't resist. It's a great place to browse and get good ideas.

Better Get Better


This get well card was inspired by a card I saw on SCS that had 3 little flowers in a row with a border around them and that was it. It was so sweet. The problem was that I don't have any small flower embellishments, so I had to make mine. I sponged white cardstock with ink and used a flower punch, then added crystal brads in the center. I had to create my own border by doodling with a green SU marker. I thought this DP went well with the flowers. I used my SU corner punch to accent the sentiment. The sentiment is from SU, and I used my SU markers to ink it so I could do it in 2 different colors.