Sunday, March 30, 2008

Money Gift Card Tutorial #2


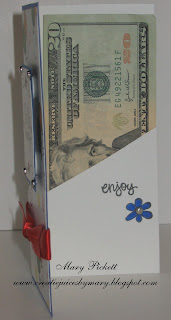
Here is the tutorial for the tall money card (the one with the balloons).

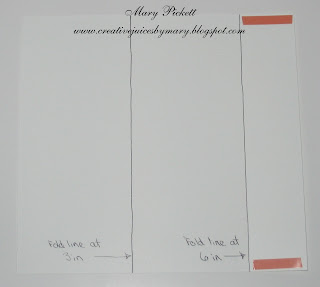
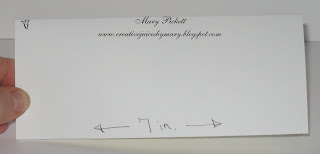
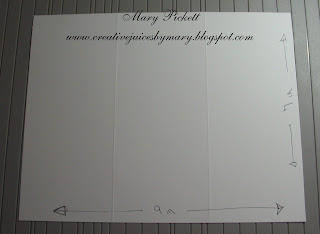
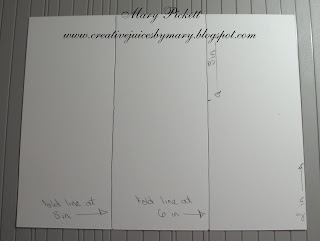
1. Cut a piece of white CS 9 inches x 7 inches.

2. Make fold lines at 3 inches and at 6 inches.

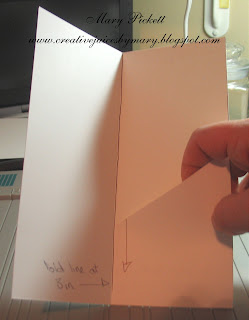
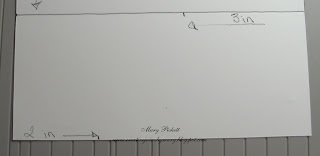
3. With the longer edge towards you measure up 2 inches on the right hand side edge. Then measure down 3 inches from the top on the right hand fold line. (very confusing, I know. See photo).

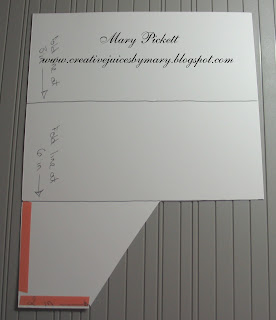
4. Cut the fold line from the top to the 3 inch mark. Then cut at an angle from the 2 inch line to the 3 inch line.

5. Place adhesive on the bottom and edge of this flap and fold it in. This creates the pocket for the money on the inside of the card.

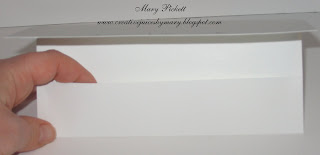
6. Fold the 3 inch section over. This creates the front or face of the card for you to decorate.

I hope this makes sense. Again, please leave a comment or e-mail me if you have any questions.
Money Gift Card Tutorial #1


I have already had a few people ask for instructions for the money gift cards so I put this tutorial together. First of all this is the first tutorial I have ever done so forgive me if it is not clear. Secondly, I threw this together very quickly tonight because I knew I wouldn't have time tomorrow to do it. So again, forgive me if it's not the best.


This first one is for the sideways money card (the pink and black one).


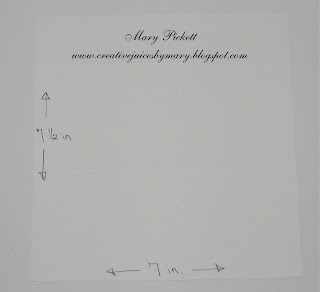
1. Cut a piece of white CS 7 1/2 inches X 7 inches.


2. Make fold lines down the longer side at 3inches and at 6 inches.


3. Place adhesive on the edges of the 1 1/2 inch section and fold it up. This creates the pocket to place the money in on the inside of the card.


4. Fold down the top 3 inch section over the inside of the card. This creates the front or face of the card for you to decorate.


That's it for that one. I hope it makes sense. Please leave a comment or e-mail me if you have any questions.

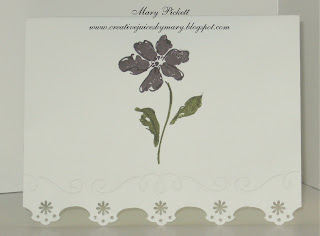
Simple Flower


This is a card I made for a friend of mine. I just learned yesterday that her mom had a stroke a little while back and is having a hard time recovering the use of her left arm. I feel bad for her mom of course, but I also feel bad for my friend. She has small children and works part time so she probably doesn't get to be with her mom and help her as much as she would like. Sad. So I thought I would make her this card to let her know that I am thinking about her. I hope she likes it.

Supplies:
CS- SU WW
Corner Adorner- CK Success
Flower punch
Hole punch
Dry embossing
SU markers
Stamp set- SU "Heartfelt Thanks"

Money Gift Card #2


Here's the second money gift card I came up with. I really like this one because it is one of my favorite color combinations, also because I have had this ribbon in my drawer for over a year and have wanted to use it for something special. I think the design on the ribbon is very collegiate which fits the theme. :) Enjoy!
Supplies:
CS- SU WW, BB, Pretty in Pink
Stamp sets- SU "Background Basics" and "Eventful"
Ink- SU Pretty in Pink and BB
Ribbon- Michael's
Brads- Scrapbook Corner
Small oval punch- SU

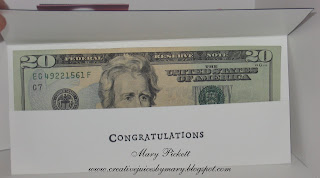
Money Gift Card


I don't know why I was thinking about this when I was getting ready for church this morning but I realized that out of all the cards I have seen on Splitcoaststampers I have never seen a money gift card. I'm sure they have been made before but I just have never seen them. So as soon as everyone was settled after coming home from church I immediately sat down and come up with some. I really think they turned out great and am so proud of myself for thinking of it. (I know it's tooting my own horn but I'm just excited! ) :) I hope you like them too.
Supplies:
CS- SU WW and Brilliant Blue
Stamp set- Studio G (got out of the Michael's $1.00 bin!)
SU markers
Corner punch- SU
Brads- Michael's
Ribbon- Michael's

Saturday, March 29, 2008

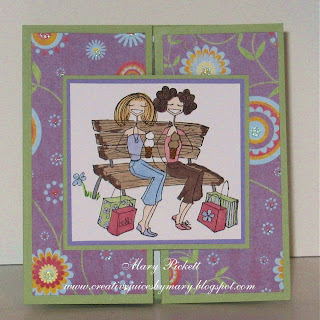
Girlfriends


Do you have any Bellas? If you said no...Have you been living under a rock or something? Bella is the best! LOVE HER!! She is so hip and fun and always looks great. Here she is sitting with her friend chit chatting over ice cream after a long day of shopping. I wish I had Bella's life. Until my kids are grown I will just have to live vicariously through her. :)

This is my first tri-fold card and I was surprised at how easy it was to make. I got the template off of someones blog but I can't remember who's, So if you need one I would tell you to just go to the Splitcoaststampers' website and search for it there. I'm sure they have one.
Supplies:
CS- SU
DP- purchased at Scrapbook Corner, maker unknown

Moose on the Move


I just love Riley Moose from Hanna Stamps, he is just so sweet. I bought a bunch of these recently so you will probably be seeing Riley on a lot of my cards in the near future. When I saw this one I just had to get it because my dad is a farmer, not by trade but in his heart. He was born and raised on his family's farm and inherited it when his parents died. Although he did not do this for a profession he has spent most of his retirement restoring the farm to look like it did when he was a boy. So when I saw Riley on this tractor it reminded me of my dad. And because dad owns Allis Chalmers tractors I had to color it orange for him. No matter where I go or what I do I will always keep this stamp and think of dad. I hope you like this one dad!! :)
Supplies:
CS- SU Choc Chip, VV, Bashful Blue, watercolor paper
Marker's & water color brush- SU
Ribbon- Wal Mart
Brads- Michael's
Photo corner punch- SU
DP- My Mind's Eye

One of My Own!


Finally here's one of my own! Today was a "family day". We took the kids to the Children's Museum here in Indianapolis and then out to lunch. We went to a new place (well, new to us) called Stir Crazy. As you might have guessed it's a Chinese restaurant and it was wonderful! When we got there they gave our kids some kids menus with games in them, crayons, and chopstick helpers which were all in a miniature Chinese takeout box. I told my husband I had to remember to take them home because I wanted to open them up and use them as templates for some fun gift boxes. Upon opening them I found that I needed 12x12 paper in order to fit the entire box on it. I would have preferred to have used Chinese themed paper but alas, I didn't have any and I didn't want to go out just for that. So I went ahead with this for now. It works fine I think.
Supplies:
DP- SU
Small and large tag punches- SU
Sentiment- SU "Lots of Thoughts"
Ink- SU Close to Cocoa
Ribbon- Martha Stewart
Flowers- Papertrey
Brads- Michael's

Another One From "My Life"


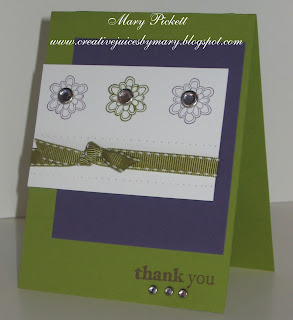
Here's another cased card from the "My Life" site (I told you I love her work). Crisp, clean, and great colors together.
Supplies:
CS- SU Old Olive, Elegant Eggplant, WW
Ink- SU Old Olive, Elegant Eggplant
Paper piercing
Ribbon- Michael's
Crystal brads- Michael's
Sentiment- SU "Spring Solitude" stamp set

It's Been So Long!


My gosh! It's been so long since my last post, hasn't it? I have made several things but haven't had any time to post them. I will definitely be making up for it today! This first one is a great card cased from one of my favorite blogsites "My Life" (check it out on my sidebar). It was a great idea she had and a lot of fun to make. After cutting out the flower from the "Doodle This" stamp set from SU the petals were rounded over a pencil and adhered to the back with a glue dot, and then that was adhered to the card with a popdot for even more dimension. Super fun!
Supplies:
CS- SU BB, WW, Certainly Celery, So Saffron, Cameo Coral
Crystal Brads- SU
Sentiment- Stampendous clear alphabet stamp set
White Galaxy Marker

Sunday, March 23, 2008

Long Awaited Baby


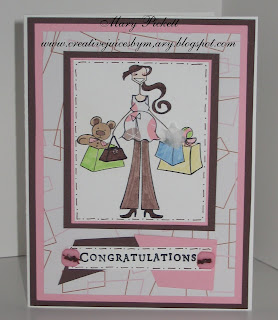
This is a card I made for a friend at work who, after several years of trying and thousands of dollars spent on fertility rounds, is finally pregnant! I have known she is pregnant for almost 2 months now but was afraid to give her a card for fear of jinxing it. But she has been released to her regular OB now so I guess it's safe. I have a feeling it's a girl so I went ahead and put pink on it, hope she doesn't mind. I did a few cute things on this one. First, I adhered real tissue paper on top of one of the bags to give it a 3D look. I added buttons with real thread for some texture. And I also used DP for her shirt for a twist. Fun! I hope she likes it.
Supplies:
DP- "Pizazz" by Colorbok
CS- SU Choc Chip, Pretty in Pink, WW
SU markers
Image- Stamping Bella
Sentiment- Hero Arts
Buttons- SU

Springtime Showers


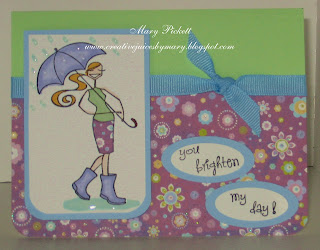
Well, I hope you all had a wonderful Easter. I sure did. Beautiful weather, great time with family, tasty treats...what more could you want? I even found a little time to make a few cards while my kids watched a movie that the Easter bunny brought. This one was really fun to make. I just got this Bella this week and when I saw her I knew I wanted to do something fun with raindrops. I made raindrops with my Copic marker and then covered them with Crystal Effects. I did the same thing with the puddle. They really look wet and give it a 3D effect. I also did something special for her skirt. I stamped the image again on the DP and cut out the skirt. Then I adhered it to the image so her skirt matches the background. Also, I couldn't fit the sentiment inside one oval so I divided it and put on two. I really like how everything turned out.
Supplies:
DP- unknown (purchased at Scrapbook Corner)
CS- SU WW, Gable Green, Bashful Blue
Copic markers
Crystal Effects- SU
Ribbon- JoAnn's
Image and Sentiment- Stamping Bella
Punches- SU lg and sm oval, corner rounder

Saturday, March 22, 2008

Flower Fusion


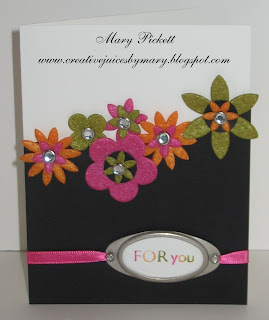
I just love the way the flowers stand out against the black on this card. The design for this card came from Silke Ludlow's blog "My Life" which I love (the link is on my sidebar below). She really does great work and her color choices are always fabulous. Her flowers were done with paper and flower punches. But I didn't have any punches like that that would work so I used my Flower Fusion kit from SU. I wish they had more of these kits in different colors because you really do get quite a number of flowers in a variety of sizes. I would buy them all so it's probably good that they don't have too many of them. :)
Supplies:
CS- SU WW,BB
Ribbon- Michael's
Crystal brads- SU Pretties kit
Sentiment- Papertrey Inc.
Hardware- Michael's
Sentiment colored with SU markers

Stacking Boxes


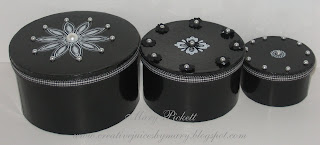
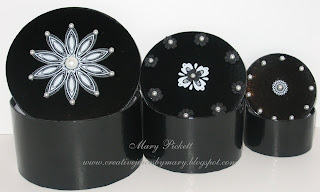
Here is another great Target dollar spot find. These are stacking boxes that come in 3 graduating sizes. I knew when I saw them that I wanted to use Stampin' Up's new rub-ons with them. These rub-ons are so easy to use and give such a great look to a project. They are also very durable. I know this because I got an unwanted piece on one of the boxes and couldn't get it off no matter how hard I scraped, so I just covered it with a flower. :)
Supplies:
Ribbon- Michael's
Pearls- SU Pretties kit
Paper flowers- Papertrey Inc.

Friday, March 21, 2008

Good Friday


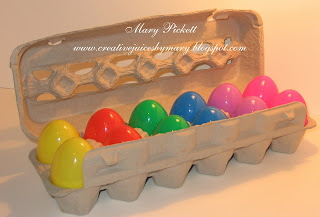
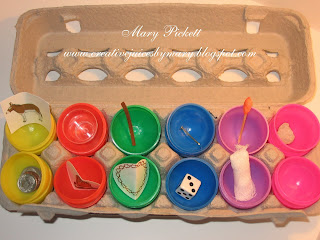
Hello again everyone! I hope you all have had a good week. Mine was a week of recovery from my back pain and I'm happy to say that it's almost completely gone. I haven't had a chance to do any projects yet today because I've had a lot of errands to run So I thought I would show you something that my daughter made in her Kindergarten class today in preparation for Easter. It is the neatest thing! They are called Resurrection Eggs. Each egg has something in it that represents significant events of the Passion of Christ. I hope the picture comes out well enough for you to see what is in each egg. If you click on the picture it will enlarge to give you a closer look. I just think this is a great way to teach children about what Christ went through for us. I will definitely be keeping this for a long time. I hope this touches you as well.
Donkey - Jesus' triumphal entry into Jerusalem
3 coins - Judas' blood money
Cup - The Last Supper
Praying Hands - The Garden of Gethsemane
Leather Strip - Jesus' trial and 39 lashes
Crown of thorns - Mocking of Jesus as "King of Jews"
Nails - Jesus' crucifixion
One die - Soldiers gambling for Jesus' robe
Spear - Roman soldiers piercing Jesus' side
Linen - Grave clothes
Stone - The tomb with the stone rolled away
Empty egg - Jesus' resurrection from the dead

Sunday, March 16, 2008

Feeling Better


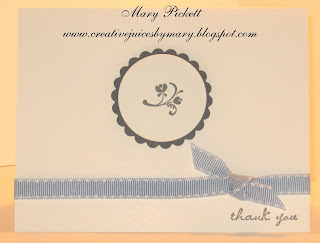
Well, I'm feeling a bit better today. My back is only sore in certain positions and if I avoid those I'm pretty good. So I was able to make a set of 5 thank you cards for our lawyer. I know, kind of strange to give your lawyer cards. But he drew up our first will and had us over to sign it yesterday and he only charged us $25.00. Can you believe that?! I guess all lawyers aren't bad ;)--just kidding. Actually, his wife works with my husband so he gave us a deal. Quite a deal I'd say. So that's why I thought I would do something to show them how much we appreciated it. I don't know their style so I made them simple. You can't tell by the picture but I used my Nestabilities circle die to emboss the image as well as to cut it out. Anyway, I think they will like them.

Supplies:

CS- SU WW and BB

Nestabilites circle and scallop circle dies

Image and sentiment- SU "Noteworthy"

Ribbon- Jo-Ann's


Saturday, March 15, 2008

Just One Post Today


Hi everyone. Sorry, I only have one post today. Something happened to my back last evening that put me out of commission. I must have strained it somehow but it was killing me! My husband had to help me into bed and then had to help me turn over during the night. It was terrible. I told him that he needs to trade me in on a new model. He said "Nah, then I'd have to break her in and you are just how I like it." :) It has eased up some today but is still sore. Luckily I had already made this project yesterday so I only had to take a picture of it and post it. Hopefully I will feel better tomorrow because I have lots of cards I need to make.


So this is actually something I came up with on my own-well, sort of. You know how I already made the post-it note covers using Julie B.'s idea? Well, at Target's dollar spot they also had these large note pads that have magnets on the back so you can put them on the fridge. So I thought I could cover those too. It turned out great! I made them just like the post-it note covers only sideways and on a much larger scale. I took the magnet off the back of the note pad and adhered it to the back of the cover. These can be made to match any kitchen decor and would be great gifts. What do you think?
Supplies:
CS- SU certainly celery, apricot appeal, bashful blue
SU markers
Image- SU "Doodle That"
Nestablities circle and scallop cirlce dies
Ribbon- Jo-Ann's
Scallop scissors

Friday, March 14, 2008

Let The Sunshine In!


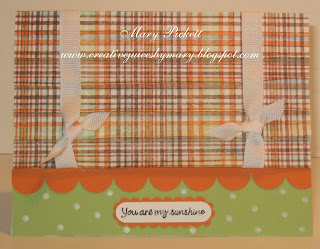
Isn't this a great idea for a card?! I wish I could claim it as my own but alas, it is another case from the new Papercrafts magazine. This one was designed by Rae Barthel. In case you can't tell, it simulates Roman curtains. Isn't that cute?! When I saw it I knew I had to give it a go. I don't know if I put it together just like she did but the end result looks the same. And I love this sentiment. Not only does it go with this card because when you open curtains you are letting the sunshine in, but my beloved grandmother used to sing the "You Are My Sunshine" song to me when I was a little girl. I actually sang it to my daughter for the first time since she was a baby the other night. She didn't remember me singing it to her before because she was to little so it was new to her. She held still (and maybe held her breath) through the entire song and when I was done she said "Oh Mommy, that was beautiful! I love you so much." My daughter was actually born on the anniversary of my grandmother's death. So I imagine her getting part of my grandmother's soul. She really is a lot like her too. Very fun loving, happy, sweet, and thoughtful. We are all blessed to have her. :)

Supplies:
DP- source unknown, purchased at Scrapbook Corner
CS- SU certainly celery, pumpkin pie
Ribbon- Jo-Ann's
Slit punch and window punch- SU
Scallop scissors
Sentiment- SU "You Are My Sunshine" set
White Galaxy marker for the polka dots

TGIF!!!!


Thank goodness it's Friday!! I know it's not good to wish your life away but I'm so happy another week is done. The past few weeks have been so busy for our family and we are in desperate need for some calm time together. So after I'm done here I'm going to go to Wal Mart and buy The Bee Movie, which is great and if you haven't seen it you need to, so we can have "family movie night" tonight. Then my husband has arranged a date night for us for tomorrow night. Fun!!

Anyway, on to the goods. This is a card I cased from the new April/May Papercrafts magazine. It was designed by Daniela Dobson. I tweaked it a little bit but it is still very close to hers. I think it would make a good wedding card.
Supplies:
CS- SU BB, WW
Stamp- unknown source, purchased at Archiver's
Ink- SU BB
Flowers and crystal brads- SU Pretties kit

Sunday, March 9, 2008

Another Dollar Spot Find


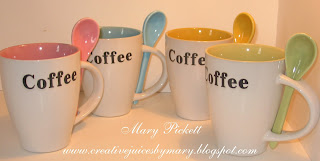
Aren't these just the cutest little coffee mugs you've ever seen?! I also found these at Target's dollar spot today. I don't think I will embellish these because there great they way they are, but I will probably fill them with little coffee bags, creamers, candy, etc. Do you see now why I love the dollar spot?!

Love The Dollar Spot!!


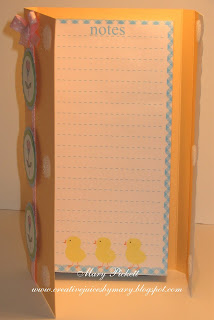
I just have to say it...I am in love with the dollar spot at Target! They have such great things for crafters to alter or embellish. Today while I was there I found these little spiral notepads. I think they would be perfect to keep in a purse or give to a child to draw on (in my mothering experience it's great to have things to keep them busy at a restaurant while waiting for the food). Anyway, I think they turned out pretty good!
Supplies:
CS- SU choc chip, pretty in pink, certainly celery
Images- SU & Hero Art
Markers- SU
Ribbon- Wal Mart
Eyelets- SU
Slot punch- SU
Oval cutter- Creative Memories
Scallop scissors

Stampin' Up Party Project #1


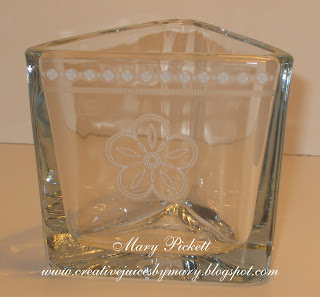
I had a Stampin' Up party at my house yesterday and it was really fun! In between talking and eating we actually got some projects done. ;) This first one is a votive candle holder that I got at Walmart for 97 cents. I then used the SU rub-ons to decorate it. These rub-ons are great and easy to use. The uses for them are probably endless. The girls really liked how it turned out and thought it was a great idea. One even said she now has a Mother's Day gift done! Give it a try yourself. Mary

Stampin' Up Party Project #2


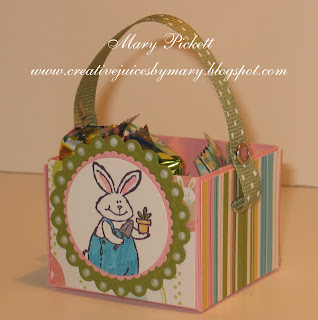
This little mini treat box was a big hit too. I got the directions for this from last week's SCS's weekly inkling. It is super easy and just big enough for a few mini candy bars, but small enough that it doesn't use up a lot of paper. Very cute! All supplies except ribbon are from SU.

Stampin' Up Party Project #3


Now for project #3. I just love, love, love this cherry stamp and cherry DP from the new SU mini catalog. It just says 'happy' to me. Again, all supplies are from SU.

Stampin' Up Party Project #4


Here is project #4 from the party. When I saw this empty park bench stamp in the new mini catalog I thought it screamed "miss you". So I designed this card. All supplies are from SU.

Friday, March 7, 2008

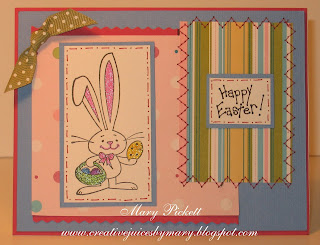
Ol' Cottontail Comes Again!


Just a quick post today because I have to get ready for a SU party I'm having tomorrow. Here is another card I made with this adorable little guy. I think it's fun and festive. Have a great day!
Supplies:
CS-Archiver's, brand unknown
DP-SU "Petals and Paisleys"
Image-Inkadinkado
Sentiment- handwritten by myself
Doodling on edges done with SU Baroque Burgundy marker
Colored image with Spica glitter pens
Ribbon- JoAnn's
Stitching done on sewing machine

Tuesday, March 4, 2008

Lots of Punching


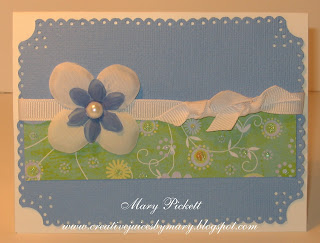
This card was inspired by a design by Melissa Phillips from last month's edition of Papercrafts magazine. I think the scalloping and punching along the edges make it look so delicate. (But it took a while, let me tell you!) I hope you enjoy it.
Supplies:
CS- Archiver's (brand unknown)
DP- Jo-Ann's (brand unknown)
Ribbon- Wal-Mart
Flowers and pearl- SU Pretties kit
SU Bliss Blue marker to color the middle flower
Hole punch
Scallop scissors

Dots and Dashes


Well today is an unplanned vacation day for me. My son came down with a fever at school yesterday and the rules are that you have to be fever free for 24 hours before returning. Which means that even though he was completely fine all night and this morning, he had to stay home. I understand why this rule exists but I'm trying to save PTO time for our trip to Disney World and this makes it difficult. Oh well, all in the fun of having kids I guess! *wink* Anyway, since he has been fine all day I was able to get a little crafting done! :)
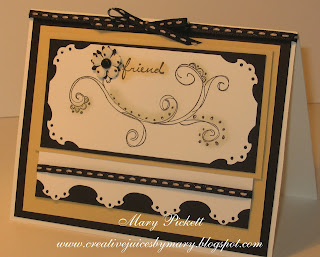
I made this card to try out my new punches I got at the craft show. The corner adorners by EK Success are very versatile. Not only can you punch out corners, but when you remove the guard you can punch along the edge of the paper as I did here. Also, on some of the punches when you remove the guard you can actually punch the inside corners of a card by the fold! Pretty cool!
Supplies:
CS-SU WW, BB, Sahara Sand
Stamp-SU "Doodle This" and "Noteworthy"
Ribbon-Michael's
Ink- SU BB
Chalks-SU Always Artichoke, So Saffron
Paper flowers- Papertrey Inc.

1,000 Hits!!

I've reached 1,000 hits on my blog!!! I know this is nothing in the world of blogging but it means a lot to me. There's actually a few people out there who look at all my random stuff! I've only had a few comments from people so I kind of wondered who all these people are who look at my blog since I never hear from the rest of them. Please leave me a few more comments so I know you're actually out there!! :0) Have a good one. Mary

Monday, March 3, 2008

Here Comes Peter Cottontail!


Is this not the absolute cutest little bunny you've ever seen?! At the Heirloom Papercraft show I went to on Sunday they had several make-n-takes. I let my daughter do these in order to keep her interest in being there and because she loves crafty stuff and being just like mommy. :) So this is where I saw this little guy for the first time and it was love at first sight! With this make-n-take they were having us try out these glitter pens from Spika (I think that's who makes them--most of the writing on them is in Chinese so it's hard to make it out). Anyway, I made one swipe with one of these pens and I was sold! I had to have them, they are great! The color is so vibrant, the movement is so fluid, and there is glitter built right in! What more could you want?! I know there's not too much to this card but it was late last night when I made it and I really just did it to use the pens once more before I went to bed. So it's simple but the image is just adorable I think.

Sunday, March 2, 2008

What a Glorious Day!


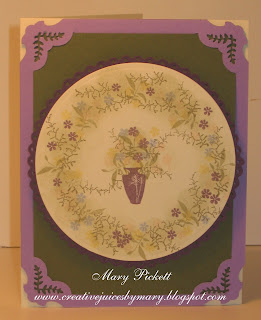
What a glorious day today has been! After church my daughter and I went to the Heirloom Paper Craft show at the Indianapolis Fairgrounds. There were quite a few booths there and I found some great things. Then when we left it was 64 degrees outside so we went home and she rode her bike to the park and we played on the swings, etc. until dinner time. I even found time to make this card with some of my new purchases. I really like the delicate feeling this stamp set gives to the card. Enjoy!

Supplies:
Image- "Yumy's Garden" Rubber Stamp Tapestry
CS- SU VV, Elegant Eggplant, Lavender Lace, Always Artichoke
Ink- SU Perfect Plum, Blush Blossom, Barely Banana, Mellow Moss, Bashful Blue, True Thyme
Sponge dauber
Nestabilities circle die
Scallop scissors
Hole punch
Corner Creator and Corner Adorner from EK Success

Saturday, March 1, 2008

Sidekick Thank You


This is a card from a set of cards I made for my co-worker's daughter. It will be her birthday on Wednesday and will also be getting engaged, so I thought she could use some thank you cards. I know I might be biased but I think cards are a perfect gift because one can always use them. It helps to already have them on hand for that last minute occasion. Papertrey Inc. sells these great clear plastic gift boxes that a set of 5 cards and envelopes fits great into. You get 10 for $6.00 I think--great deal! I just tie coordinating ribbon around the box and there you go.
Supplies:
CS-SU Basic Black, WW, Sahara Sand
Stamp-SU "Sidekick Sayings"
Ribbon-Archiver's
Flower-SU Pretties kit
Stitching-white Sakura gelly roll pen

Another Milestone


Well, our family reached another milestone today. My son had his First Reconciliation. I can tell you we were much more excited about it than he was! It's never fun to have to admit to someone all of your sins and faults, and he kept thinking that he was going to be in trouble (as if he was going to the Principal's office or something). But he did a wonderful job (quivering lip and all!) and it helped that there were snacks for him afterward. :) So my son is sin free (for now anyway). ;)
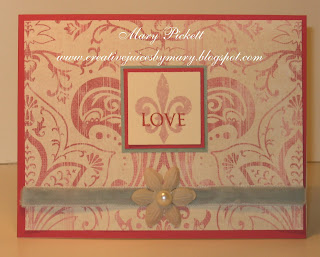
On to the card. This is a card that I made for a daughter of a coworker. Unbeknownst to her she will be getting engaged this Wednesday so I made her a congratulations card. I know, I know, you're supposed to say congratulations to the man and best wishes to the woman. But this is the 21st century, who follows those rules anymore?!
Supplies:
CS-SU Very Vanilla & Rose Red
DP- Sandylion "Paisley Pink"
Ribbon-Archiver's
Flower & pearl-SU Pretties kit
Colored flower with warm gray copic to make it more antique in color
Image-SU "Carte Postale"
Sentiment- Papertrey
Ink-SU Pale Plum & Baroque Burgundy